Beginner Bladesmith Toolkit
What You Need to Know Before You Start Forging Knives
This content is part of our Bladesmithing for Beginners course, the ultimate online introduction to the ancient art of bladesmithing.
Bladesmithing for Beginners Course Excerpt: Phase 1, Setting Up Your Shop Video Lesson
Beginner Bladesmithing Tools & Supplies
If you ask most experienced bladesmiths, they’ll tell you that you only need three things to get started: a hammer, an anvil, and a heat source (not counting, of course, the steel you’ll be hammering). Though you can technically get started with those three things, we have compiled a list of suggested tools for beginners, with examples of where to find them. Note: We have provided links to show you the types of products we recommend, but we do not endorse or promote any specific brand or store, nor do we receive affiliate income if you purchase these products.
5160 steel
In our Bladesmithing for Beginners course, you’ll learn that we advocate choosing a single type of steel—like 5160 steel—and using new, clean pieces instead of attempting to learn with junk steel. When you use a new piece of 5160, you know its exact chemical properties and can reference information about the exact temperatures needed to forge and heat treat it. Places you can purchase 5160 steel:
Work bench
Your work bench should be about waist height and comfortable for working while standing. The type of bench doesn’t matter as long as it’s sturdy. If you don’t want to purchase a new work bench, you may be able to find a good used work bench at a garage sale, estate sale or flea market, or you may opt to build your own.
Vise
There are many different types of vises, and if you already own one, it will probably work for this class. However, we recommend using a parrot vise with a tilting jaw for this course. The tilting jaw is an attachment that allows you to get a better grip on your knife when using a vise. Many experienced bladesmiths choose to work with a more expensive knife maker’s vise, which is nice to have, but not required for this course.
Belt Grinder
Grinding is one of the most difficult parts of making a knife, and it’s important to have good equipment to work with when grinding. Our examples may seem pricey, but they are the minimum quality we recommend. Experienced bladesmiths often say you should draw file your knives until you can save enough to buy a good grinder. If you choose to look for a different brand, opt for a grinder with a longer belt whenever possible the longer the belt, the less heat the belt will put off while you’re grinding.
- Reeder Products, Inc. makes high quality grinders that are preferred by many experienced bladesmiths.
- KMG Belt Grinders are another excellent choice if you want to go ahead and invest in a more professional grinder.
- On the lower end of the price spectrum, a grinder like this Palmgren 2″x42″ belt grinder with disc is a good option, as is this Kalamazoo belt sander.
Forge
Many bladesmiths choose to make their own tools and equipmentincluding forges. If you prefer to make your own forge, we suggest that you consider purchasing the DVD How to Make a Gas Forge, available in the American Bladesmith Society online store. If you would like to purchase a ready-made forge, these are some options available to you:
- NC Gas Forges are high-quality forges starting at $455.
- Hell’s Forge offers more affordable ready-made forges.
Propane Tank
Now that you have a forge, you’ll need to make sure you have plenty of propane to keep it going! You can purchase a propane tank (like this one) at just about any hardware store, or find an inexpensive after-market propane tank. Your propane tank should be 100 lbs minimum. Smaller tanks will freeze up and make it impossible to keep your forge fired up. As a general rule, the larger your propane tank, the less propane you will use.
Sandpaper
You can also find sandpaper at your local hardware or automotive paint/supply store. In fact, automotive sandpaper works better for knife making than other kinds of sandpaper. Look for the following grits: 120, 150, 180, 220, 320, 400, and 600.
Magnet
Another easy hardware store purchase. You may already have one that you can use! Any cheap magnet will work.
Quenching Oil
You’ll need 4-5 gallons of quenching oil. Ultimately, the amount you need depends on the size of the metal container you’re using (we’ll get to that next). We recommend that beginners start with peanut oil or canola oil, which you can buy at any grocery store. You can also purchase commercial quenching oils (like this one), which we recommend if you can afford it.
Metal Container
This container needs to be deeper than your knife is long just make sure it’s metal! Do not under any circumstances use a plastic container for quenching.
Toaster Oven
You’ll need just a basic toaster oven nothing fancy! You can find a used toaster oven at a yard sale, flea market, or estate sale, or buy a new inexpensive one (like this Black+Decker one) just about anywhere you can buy kitchen appliances. Some bladesmiths even use their conventional kitchen ovens for this part.
Anvil
This is probably the toughest thing to find when you’re starting out as a bladesmith. Good anvils are in high demand, and new ones can be very expensive. You’ll want an anvil that’s 100 lbs at the minimum. Some places you can find anvils:
- Estate sales, yard sales, auctions, and flea markets can be good sources for used anvils
- Local blacksmith clubs
- Farrier supply shops
- You can sometimes find anvils for sale online, but watch out for shipping charges. Shipping a heavy anvil can be expensive!
If you are having trouble finding an anvil, you might consider making your own. There are lots of tutorials online for creating anvils for example, this tutorial explains how you can use sections of railroad rail to create a makeshift anvil.
We definitely recommend purchasing an anvil if you get serious about bladesmithing, but if that’s holding you back, find a short-term solution to get started and be on the lookout for a good anvil!
Tongs
Many bladesmiths and blacksmiths make their own materials, including tongs. If you’re going to purchase tongs, we recommend a pair like these Caliburn Knifemaking and Blacksmithing Tongs.
Cross Peen Hammer
Hammers come in lots of different sizes, and the size you need really depends on you. In general, you should use the biggest hammer you can handle while still maintaining control. If you’re able to, try using different hammer sizes to get a feel for what size works best for you. As your skill develops, so will your taste in hammers you may even want to make your own. To get started, you don’t need an expensive hammer. A cross peen hammer like this one from Estwing (or a comparable hammer) will do the trick!
Spring Fuller
This is a piece of equipment that you’ll need to make yourself. Luckily, you’ll have a forge and anvil to work with! This video tutorial will show you how to make your own spring fuller.
Cutoff hardy tool
This is another tool you can make yourself using a grinder and a metal cutting blade. You can also purchase a ready-made cutoff hardy tool from a blacksmith shop (such as these from Blacksmiths Depot).
Eye protection
Make sure you have eye protection anytime you are working in your shop! Whether you’re using inexpensive disposable safety glasses or a more durable pair like these from DeWalt, you never want to leave your eyes exposed while you’re working with hot steel and grinders.
Ear protection
There’s a reason many experienced bladesmiths are hard of hearing: the many loud sounds in a bladesmith shop can have a long-term impact on your ears. We recommend that you wear foam earplugs at the minimum. If you can, you may want to invest in heavier duty ear protectors.
Lung protection
Though we aren’t wearing respirators in our videos because we needed to be able to talk through the forging and grinding process, we recommend that you always wear some type of lung protection when you’re working in a shop. At the minimum, protect yourself with a disposable mask. For long-term protection, you may want to invest in a multi-purpose respirator.
Gloves
A sturdy pair of leather work gloves is important when you’re working with hot steel. Welding gloves will also work!
Leather Apron
A heat and flame resistant heavy duty leather work apron will help protect you while working with hot steel and fire.Fire Extinguisher
You’ll want a current fire extinguisher in your shop, just in case!
When it comes to knife making, there are a lot of steps to forging a quality blade, and it can be tough to even figure out where to start. Our online course for beginner bladesmiths is the definitive resource for someone looking to learn the basics in a structured environment. Learn more about our Bladesmithing for Beginners course!
Free Downloads

Ready to forge your first knife?
Introducing Bladesmithing for Beginners
If you ask 100 different bladesmiths what tools and knowledge you need to get started, you'll get 100 different answers. We're here to help.
Our FREE Beginner Bladesmith Toolkit includes:
- Guide for setting up your first shop
- List of tools and equipment you need to forge your first knife
- Printable bladesmith shop checklist (.pdf)
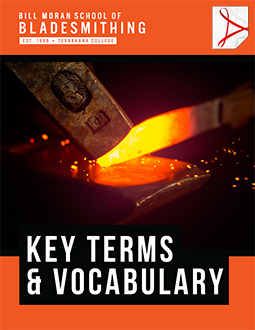
- Key bladesmith terms and vocabulary (.pdf)
- 5160 steel information sheet (.pdf)
- Steel heat color chart (.pdf)
Get Free Access to the Beginner Bladesmith Toolkit
Enter your email address to access your Beginner Bladesmith Toolkit!
